Field Sampling Kit for a Spent Molecular Sieve Bed: Building an ASTM E300-Compliant Procedure and a Chain of Custody That Survives a Warranty Dispute
Primary reader: procurement engineer or QA/QC analyst responsible for adsorbent change-out decisions. When a two-tower PSA or heatless dryer is due for a media change, the spent molecular sieve bed is the only physical evidence that will ever exist of what actually happened inside that vessel. It is also the single most commonly mishandled piece of evidence in the industry. The bed is sampled once, with a handful, into a plastic bag, sent to a lab, and reported as a single composite number — and when the supplier disputes the result, nobody can reconstruct how that number was obtained.
This guide sets out a field sampling kit and procedure built on ASTM E300 (Standard Practice for Sampling Industrial Chemicals, ASTM Committee D16.08), the practice that actually governs how a representative sample is drawn from bulk and packaged solids. We also cover the chain-of-custody documentation, the sample-splitting hierarchy, and the analytical panel that turns a handful of pellets into a defensible diagnosis. Every step is written so it can be handed to a contractor who has never sampled an adsorbent bed before.
Note on standards: ASTM E300 is the correct sampling-practice reference. Some buyers mistakenly specify ASTM D5357 in their purchase orders — that standard covers relative crystallinity of zeolite sodium A by X-ray diffraction, not sampling. Using the wrong standard in the contract does not invalidate the sample, but it does give the supplier a documented opening to argue that the test protocol was undefined. Related practices worth citing alongside E300 are ASTM E105 (probability sampling of materials) and ASTM E122 (calculation of sample size for acceptance sampling).
Why Spent Media Sampling Fails in Practice
The analytical chemistry of spent molecular sieve is straightforward. The sampling is where the number goes wrong. Three physical realities make spent beds unusually hostile to naive sampling.
1. Vertical stratification is severe and it is not random. In a two-tower unit the inlet section sees the bulk of the contaminant loading, the middle section sees partially saturated working capacity, and the bottom section sees the cleanest bed. A composite drawn from one depth reports the average of a badly loaded top and a still-viable bottom. That average can be numerically identical to the average of a moderately loaded bed with eight years of life left.
2. Radial distribution is not uniform when distributors are worn. Above roughly 2.4 m diameter, a degraded inlet distributor can produce a 5x radial carbon gradient. Sampling only at the centre of a layer will miss a wall-localised contamination channel entirely. This is why the layer-by-layer sectioning protocol specifies three cores per layer on wide beds rather than one.
3. Desorption continues after sampling. A hot bed sampled above 40 °C keeps releasing adsorbed water into the headspace of the sample container during handling. The moisture result then reads low, and an operator concludes the media is drier than it was in service. The same sample left overnight in a warm truck can lose enough water to move a Karl Fischer result by a full percentage point.
| Sampling error source | Typical magnitude | How it biases the result |
|---|---|---|
| Single-depth composite | High (2–5x on contaminant) | Understates top-of-bed loading, overstates remaining life |
| Wall-only sampling | High on wide beds | Overstates contamination (wall effects dominate) |
| Sampling above 40 °C | 1–2 wt% on moisture | Reads low; media looks drier than in service |
| Fines migration in FIBC/drum | 0.1–0.4 wt% attrition spread | Bottom reads high on attrition, top reads low |
| Cross-contamination between layers | Unbounded if one probe reused | False positives on the cleanest layer |
What ASTM E300 Actually Requires for Packaged and Bulk Solids
ASTM E300 is a practice, not a prescriptive method. It does not tell you how deep to insert a probe; it tells you what makes a sample representative, and it defines the classification you must declare before you sample. For spent adsorbent work the relevant sections are the statistics (Sections 7–11) and the solids provisions (Sections 28–35).
The single most important requirement is that the sampling plan must be written down before the job starts, and must state the lot definition. A lot is a defined, bounded population. For spent media that means: this vessel, this tower, this shutdown window. It does not mean "the media from this site" and it certainly does not mean "a scoop from the hopper". Writing the lot definition down before sampling is what allows you to demonstrate afterwards that the plan was not reverse-engineered to produce a preferred answer.
The increment to composite hierarchy
ASTM E300 builds representativeness from a fixed hierarchy. Each stage must be defined in the plan, and you must record how many increments were taken at each stage.
- Increment — a single, small, discrete quantity of material taken from one defined position. One core from one point at one depth is one increment.
- Composite — several increments combined and homogenised. For bed sectioning, the correct composite is per-layer, not across the whole vessel.
- Laboratory sample — the portion sent to the lab.
- Test portion — the portion actually weighed into an analysis. The field sample must be large enough that the lab can take a test portion without re-grinding the material.
The error in a composite is roughly proportional to one over the square root of the number of increments. Four increments give you about half the error of one increment. Sixteen give you about a quarter. This is why the number of cores per layer is a design decision with a real numeric payoff, not a formality — going from 1 core to 4 cores per layer cuts the sampling error component roughly in half at negligible extra cost.
Sample splitting without bias
The lab receives a composite and must reduce it to a test portion. That reduction must not bias the result. For molecular sieve beads, the correct method is riffle splitting or a rotary divider, referenced to ASTM E105 and to the splitter practice in ASTM D4180 (which explicitly requires samples to be obtained by riffling or splitting to ensure representativeness).
Never quarter a molecular sieve sample by hand on a bench. Fines migrate into the pile during handling, and hand-scooping preferentially picks coarse beads off the top. The result is a test portion biased toward intact beads with artificially low attrition and an artificially optimistic-looking strength figure. Commercial rotary dividers with 8–12 chutes are inexpensive and remove this entire failure mode.
The Field Kit: Bill of Materials
A spent-bed sampling kit should be a pre-assembled, labelled kit, not a collection of whatever the technician grabbed. The standard list below covers a two-tower change-out on a bed up to 3 m deep. Costs are industry-typical ranges as of 2026, not quotations.
| Item | Specification | Why it matters |
|---|---|---|
| Vertical core probe | 316L stainless, 1.5–2.0 m sections, threaded, with captive sample cups | Depth control; must reach the bottom layer without a seam that catches beads |
| Sample cups | 150 mL, airtight screw-cap, PTFE-lined gasket | Moisture retention; ordinary lab bottles lose water over 24 h |
| Rotary splitter | 8–12 chute, 500 g capacity | Unbiased reduction to laboratory sample |
| Portable balance | 0.1 g readability, 5 kg capacity, battery | Mass-based splits at the point of collection |
| Riffle splitter | 8-way, 50–100 mL, stainless | Backup if rotary splitter unavailable |
| Nitrogen purge blanket | Portable N2 bottle, regulator, flexible cover | Prevents atmospheric moisture pickup at open manway |
| Indelible sample labels | Waterproof, pre-printed with lot/position ID | The label is part of the legal record |
| Chain-of-custody forms | Per ASTM E300 recordkeeping, sequential numbering | Admissibility in a dispute |
| Camera | Any current smartphone | Bed surface, probe position, every filled cup |
Consumables: nitrile gloves, a dedicated clean scoop per layer, sealable evidence bags for duplicates, and a spray bottle of deionised water for tool cleaning between positions. Bring more cups than you think you need. A single contamination event from a reused scoop can invalidate an entire vertical profile, and there is no second sample available after the vessel is closed.
The Procedure: Six Steps from Open Manway to Lab Receipt
Step 1 — Pre-job preparation, 2 to 3 days before turnaround
Confirm the vessel is on the turnaround scope and that the sampling window is on the schedule with operations. Define the lot in writing: vessel tag, tower, bed dimensions, media type and charge date. Define the layer boundaries. For a 3–4 m bed use five layers (top 0–200 mm, upper-middle 200–800 mm, middle 800–2000 mm, lower-middle 2000–4000 mm, bottom 4000 mm+); for a bed below 3 m use three. On beds above 2.4 m diameter, specify three cores per layer: centre, half-radius, and near-wall.
Issue the increments count as a number, not a description. "Three cores per layer, five layers, fifteen increments total, one 300 g sub-sample per increment" is auditable. "A representative sample from each level" is not.
Step 2 — Condition the vessel before opening
The vessel must be fully depressurised, isolated, and N2-purged. Verify the bed temperature is below 40 °C before the manway is broken. If the turnaround schedule does not allow the bed to cool, sample through a heated probe and run moisture within 30 minutes of collection — and record that deviation on the chain-of-custody form. Do not quietly sample hot and report it as a standard condition.
Step 3 — Take the increments
Work top-down. Photograph the bed surface before disturbing it. Draw the first increment before any material is moved, because the act of drawing the first core deforms the surface of the next one. Maintain the N2 blanket over the open manway throughout.
Each increment target is 250–300 g. That mass is deliberately larger than most individual tests require: it gives the lab room to split, and it protects against fines loss during transport. Do not top up a light increment with material from an adjacent position. If a core comes back short, record it as short and note the reason.
Step 4 — Composite per layer, never across layers
Combine the three cores from one layer into that layer's composite only. Never merge layers into a single vessel composite. The layer-by-layer results are the diagnosis; the whole-bed composite is a meaningless average and, worse, it is a number the supplier can dismiss as statistically invalid. Analyse layers separately even when it triples the laboratory cost. This is the point of the entire exercise.
Step 5 — Split to laboratory sample
Reduce each layer composite to a 1.5–2 kg laboratory sample using the rotary splitter. Retain a 500 g duplicate from each layer, sealed, labelled, and stored under custody. The duplicate is what you test if the first result is challenged. Produce duplicates whenever a warranty dispute, an insurance claim, or an environmental release is even remotely possible — after the vessel is closed, there is no way to get a second sample.
Step 6 — Seal, label, log, dispatch
Each label carries: lot ID, vessel tag, tower, layer, radial position (centre / half-radius / near-wall), core number, collection date and time, operator initials, and ambient bed temperature. Photograph every filled cup before it enters the transport container. Dispatch within 24 hours. If any litigation hold is possible, ship the duplicate set separately under a second custody record.
Chain of Custody: What Actually Makes a Result Admissible
A chain of custody does not need to be legalistic. It needs to answer six questions without ambiguity, for every sample, at any point in the next three years.
- Who collected it? Full name, not initials alone; employer; and the sampling procedure reference followed.
- When and where? Date, time, vessel tag, tower, exact position within the lot.
- What seal state was it in? Seal number at collection, and at every transfer.
- Who handled it, and when? Every custody transfer with date, time, and printed name.
- Was it opened in transit? Any break in the seal record must be recorded, with the reason.
- Where is the retained duplicate? Physical location and storage conditions, so it can be re-tested if challenged.
Number the forms sequentially and never reuse a form. If the lab receives a sample with no custody record, a competent supplier's counsel will argue the sample is of unknown provenance and the result proves nothing. That argument usually succeeds.
The Analytical Panel: What to Order and Why
The panel is split by turnaround because the priority results drive the immediate change-out decision while the secondary results explain the cause.
| Priority (24 h) | Method reference | Decision it drives |
|---|---|---|
| Water content | Karl Fischer, ASTM D6869 or equivalent | Is the media still recoverable, or is it beyond regeneration? |
| Loss on ignition, 1000 °C | ASTM D7341 modified | Coke and heavy hydrocarbon loading per layer |
| Total carbon and sulphur | LECO combustion | Contaminant family identification |
| Attrition index | ASTM D4058 | Mechanical degradation since charge |
Secondary panel within seven days: extractable hydrocarbons by Soxhlet with dichloromethane; chloride and sulphate by ion chromatography on a water extract; ICP-OES for iron, sodium, calcium, magnesium, vanadium and nickel after acid digestion; BET surface area by nitrogen physisorption per ASTM D3663; and particle size distribution by ASTM E11 sieving.
Reference values for spent Type 13X media in PSA service, industry-typical and clearly labelled as such: BET above 500 m²/g after activation, LOI below 8 wt%, total carbon below 1.5 wt%, total sulphur below 0.2 wt%, attrition below 1.5 wt%. A layer more than 20% outside these bands is a joint-investigation trigger, not a rejection trigger, and the distinction should be written into the purchase agreement before the change-out rather than after it.
Writing the Clause Into Your Purchase Agreement
The sampling procedure is worth far more as contract text than as a field document. For Type 3A, 4A, 5A and 13X shipments the recommended CoA clause is:
Report BET surface area (ASTM D3663), loss-on-ignition at 1000 °C (ASTM D7341), total carbon and total sulphur (LECO), and attrition index (ASTM D4058) on a representative sample drawn in accordance with ASTM E300 from a defined lot, with a minimum of three increments per stratum and mechanical splitting per ASTM E105. Retain and return the laboratory sample and one duplicate per stratum. Any result deviating more than 20% from the agreed reference band is subject to joint investigation on the retained duplicate.
Three clauses in that text do the heavy lifting: the ASTM E300 reference defines representativeness so nobody has to argue about it later; the minimum increment count prevents a single-scoop result from being presented as the lot value; and the retained-duplicate clause guarantees that a dispute can be resolved with evidence rather than opinion.
Four Mistakes That Void a Sampling Campaign
Mistake 1 — Sampling through side nozzles. Side nozzles on adsorbent vessels are process connections. A sample taken through one at the top head gives you material from the wall, which is always more contaminated than the bulk. Always use the top manway with a vertical probe, or the bottom manway where accessible.
Mistake 2 — One core per layer on a wide bed. Below 2.4 m diameter a single central core is defensible. Above it, a failing distributor produces a radial gradient that the centre core cannot see. This is the same failure mode documented in desiccant bed channelling and sawtooth dew-point behaviour, where the diagnostic signature is spatial rather than temporal.
Mistake 3 — Reusing the scoop between layers. Contamination from the top layer onto the scoop transfers a heavy carbon load to the bottom layer sample. The bottom layer then fails an LOI limit that it never actually breached, and a sound media gets replaced.
Mistake 4 — No retained duplicate. Once the vessel is closed the sample is the only evidence. Without a duplicate, a disputed result cannot be re-run, and the dispute is settled by whoever has the more confident engineer rather than by data.
Frequently Asked Questions
Is ASTM E300 the right standard for sampling spent molecular sieve, or should I use ASTM D5357?
ASTM E300, Standard Practice for Sampling Industrial Chemicals, is the correct reference; its solids sections and statistics provisions are what define a representative sample from bulk or packaged material. ASTM D5357 covers relative crystallinity of zeolite sodium A by X-ray diffraction and is an analytical method, not a sampling practice. Several buyers have specified D5357 in purchase orders by mistake, and while the mistake does not invalidate a correctly drawn sample, it hands the supplier a written argument that the protocol was undefined.
How many increments per layer do I actually need for a 2.0 m diameter bed?
Three per layer — centre, half-radius, near-wall — for beds above 2.4 m diameter, and a single central core is defensible below that. For a 2.0 m diameter bed with a functioning distributor, one core per layer is usually sufficient; sample three anyway if the cost is marginal, because composite error scales roughly with one over the square root of increment count and the added cost is a few minutes of field time.
Can I sample a hot bed during a fast turnaround instead of waiting for cooldown?
You can, but you must declare it. Use a heated probe and run the Karl Fischer moisture determination within 30 minutes of collection. Sampling above 40 °C without that handling will read low because desorption continues in the container, and the resulting number understates in-service moisture. Record the deviation on the custody form. An undisclosed hot sample is the easiest result for a supplier to discredit.
Should the layer composites be combined into one vessel sample before sending to the lab?
No, and this is the most consequential procedural decision in the whole campaign. A whole-vessel composite averages away the gradient that constitutes the diagnosis. Send per-layer composites and analyse them separately. The layer-by-layer sectioning protocol covers the reasoning and the practical turnaround implications in more depth.
How much sample per increment is enough?
250 to 300 g per increment, giving a layer composite of roughly 750 to 900 g and a laboratory sample of 1.5 to 2 kg after mechanical splitting. The mass is larger than any single test requires because it preserves room for splitting and protects against fines loss in transit. Bulk sample handling details are covered in the pre-shipment attrition index sampling plan.
Is a hand-sampled bag acceptable if we only need a qualitative answer?
For a yes-or-no screen, yes. For any number that will appear in a dispute or drive a chargeback, no. Hand-scooping preferentially selects coarse beads because fines migrate to the pile surface during handling, so a hand sample understates attrition and overstates strength. If the supplier is contesting the result, the cost of a rotary divider is trivial compared with the value of the change-out decision.
What is the single most common reason a spent-bed sample is rejected by the lab?
Insufficient mass for the requested panel after splitting, followed by moisture loss from non-airtight containers. A 150 g sample in a standard laboratory bottle that arrives 30 hours later will not support a full panel and its Karl Fischer result will be unreliable. Use 150 mL airtight screw-cap cups and dispatch within 24 hours.
Does the chain of custody need to be notarised or signed by a third-party surveyor?
For an internal root-cause investigation, no. For a commercial claim against a supplier, a third-party surveyor (SGS, Intertek, or an equivalent) materially strengthens the record because the collector is independent of both parties. Where a warranty or retention-of-title dispute is plausible, the marginal cost of an independent witness is usually worth the change-out value at stake.
Does this procedure change for 3A and 4A refrigerant grades versus 5A and 13X PSA grades?
The mechanics do not change: same increment count, same splitting requirement, same custody rules. The analytical emphasis does. 3A and 4A used for refrigerant drying see far less hydrocarbon and carbon loading and are judged more on water content and relative crystallinity, where ASTM D5357 is relevant as an analytical method. 5A and 13X PSA and hydrogen-purification media see heavy contaminant loading and are judged on carbon, sulphur, LOI and attrition.
How should sampling findings feed into the next media charge?
Feed the per-layer results into the charge design rather than just into the rejection decision. A top-layer carbon spike points at inlet distributor condition or an upstream filtration gap, not at the media. Regeneration-cycle problems are usually better diagnosed from bed behaviour than from a single composite result, so pair this sampling data with a ranked review of regeneration cycle creep before changing supplier or type.
What sample mass should I specify when buying adsorbent so that charge-out sampling is always possible?
Specify the charge as a minimum mass per vessel rather than a "fill to level" instruction, and record the actual charge mass at loading. The seven QC checks before loading vessels are the natural place to record it, because that is the only point where the real bed mass is known. Without it, any later volumetric calculation of bed density is an estimate.
Can the same ASTM E300 framework be used for incoming raw-material inspection of fresh media?
Yes, and it is the more common application. Fresh media in 25 kg drums inside 1 MT FIBCs is stratified during transport, with fines migrating to the bottom and larger beads to the top under the Brazil-nut effect. A five-point increment draw per FIBC, split per ASTM E105, gives a defensible acceptance result at a fraction of full-container testing. The methods are the same; only the lot definition and increment positions differ.
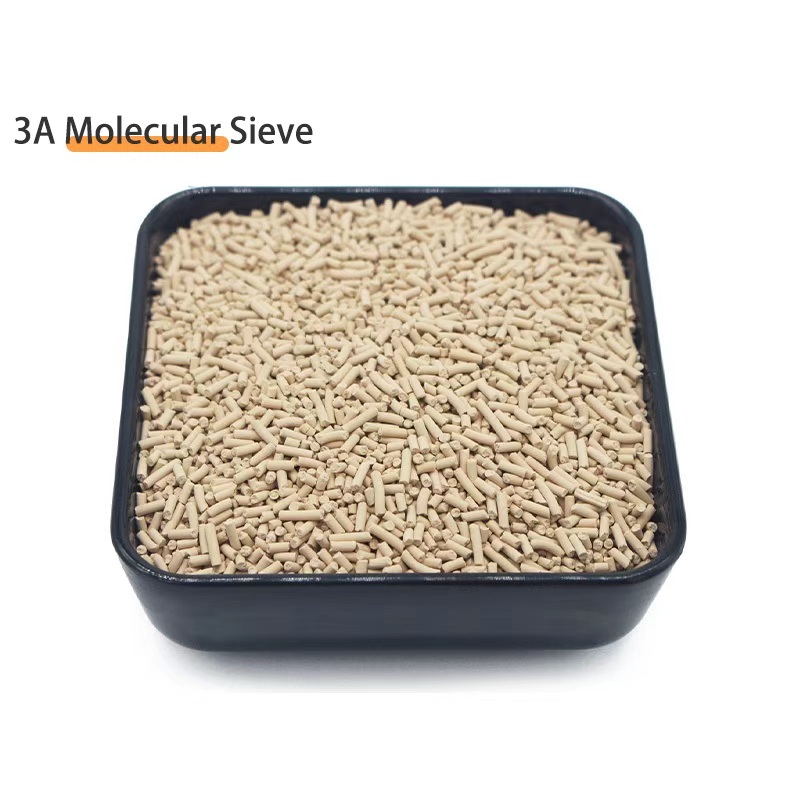
Molecular Sieve 3A / 4A / 5A / 13X
Spherical and pellet-formed grades supplied with per-lot BET, LOI, attrition and PSD data so your charge-out sampling plan has a documented baseline to compare against.
View Product Details →Next Steps
If your team does not yet have a written sampling procedure for spent adsorbent beds, the practical first step is small: define the lot, set the increment count per layer, and specify the retained duplicate in your next media supply agreement. Those three changes cost nothing and remove most of the ways a result becomes unusable in a dispute.
For buyers who need the reference procedures for activated alumina and alumina powder charge-out sampling, or who want to align a media trial across multiple vessel types, send us the vessel dimensions and bed depth and we will work through the increment plan with you before the shutdown window.
Talk to an engineer: WhatsApp +86 133 2522 2240 or email barry@aluminaworld.com. Share vessel diameter, bed depth, media type and your shutdown date, and we will return a written increment plan, layer boundaries and the analytical panel list — before the job starts, not after.